The circle and rectangles menu is located
on the main basic menu, and it enables you to make rectangles and half circles.
If you need to construct a full circle then you must draw another half or use
the mirror function to transform a half circle into a full circle.
 |
| Circle Arc |
 |
| Line tool 10 |
 |
| Separate to make a wedge |
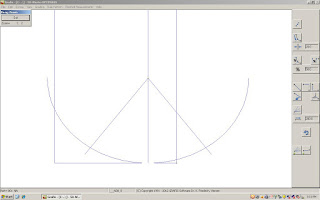
The first option selected by clicking,
circle arc out of centre point and radius,
requires a radius value to be enter into the space below, after that determine
the centre point for your semi circle and freehand click direction, a red
thread is drawn from the centre point indicating the direction the semicircle
will be placed. The second option
circle
arc out of centre point and periphery point, offers more freedom and doesn’t require a radius value as the size of
the semi circle is decided with clicking freehand and subsequent construction
of the periphery point and direction it’s placed in.
 |
| Circle Tool 10 - create godet |
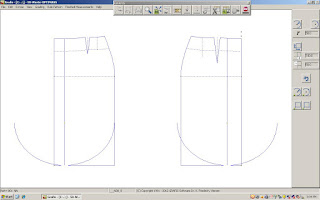
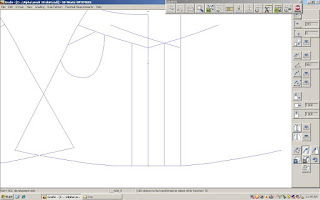
The exercise that I’ve done to practice the
interactive Circle 10 tool is to create godet in a skirt and make lovely fish
tail panels! Creating the half circles repeatedly in to fashion the godet is a
good way to practice the tool. To make the wedge shape at a 35 degree angle I
used Line 10 Tool, again repetition helps to solidify the learning.
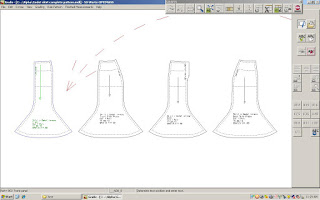 |
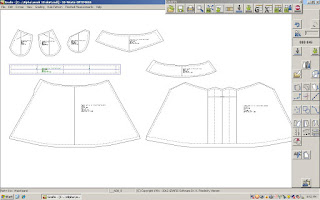
| Finished pattern of Skirt with Godet In-one |
Godets are typically triangular wedges of
fabric placed into the hem of a skirt, they can also be placed in the hem of the bodice or sleeve. They are
sewn between seams or form part of the panel (as I have done in my pattern
exercise), creating fullness and flare. They can be used as a single design
feature or in a series of several around the hem. Godets may be curved, squared
or pointed as a half circle, three-quarter circle or full circle.
 |
| Godet from another skirt example |
Waistband is constructed using the rectangle out of width and height, I
entered the value G4 for width, which generates the waist measurement for the
size that you are working in, in this instance N38 (dress size UK 10 or US 8).
The extension is 25mm for button, and the height 32mm. Add seam allowances of
10mm with parallel and notches at 50%, 25% and 75% line length. Mirror on fold
line to complete the pattern piece and label with center back, center front and
grain line.
 |
| Waistband |
Here are some pockets that are drawn using
the rectangle tool.
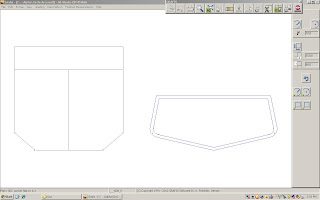 |
| Pocket and pocket flap |
Consolidating the knowledge so far in
making a pattern is very satisfying, but also makes me realize how much I don’t
know yet! I realize there’s more to discover and so much more to learn. This basic skirt with an inverted pleat in
the center front, pockets in the front side seam and a yoke is a good place to
start.
The first thing is to call the basic skirt
block, and make the changes needed in order to create a straight skirt. I need
to do this because I’m working in the educational version and I can’t save
styles and load them, but for me that’s not a problem. I adjust the length, put
in ease at the waist and hip, make the hem and side seam straighten up. I also
position the blocks so that the side seams are facing each other.
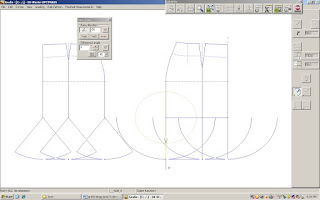
Then I created a development piece in Part
Organisation to begin putting in style lines. Dropping a line from the dart
point to the hem, then separating the hemline either side of the line. Using
transformations and turn from point to point the hem is spread open. A good
idea is to use intersection in the submenu, first determine angle, (which for
me is the dart point), second click on the intersection you want to move (which
for me is the intersection – dart/waist line closest to the side seam) and
third click the intersection where you want your final point to finish at (for
me the intersection - dart/waist line closest to the center front). This way
the center front line does not move.
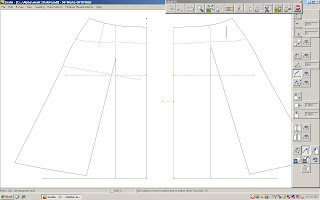 |
| Open and spread skirt with transformation |
The Yoke is created using the curve line
tool, in the submenu for curve construction. Again the depth is optional, I
made mine 80mm down the side seam and 125mm down the center front. In the
submenu for this tool insert points, direction start / finish and adjustments
allow you to achieve the desired style line, remembering to keep a 90 degree
angle at the side seam and center back.
The pocket is also created using the Curve
tool. Remember to separate your side seam and the yoke line for setting the
pocket mouth value with partial line length, mine is 80mm pocket mouth down
side seam, 140mm total pocket length down SS and 60mm along yoke from SS and
pocket bag goes to 90mm along yoke from SS. Its then a case of dragging your
inserted points using adjustments to make the bag shape.
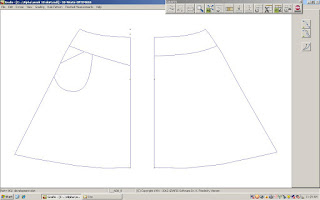 |
| Pocket and Yoke using Curve |
In
Part Organisation I listed the pattern piece to be traced off, using Insert,
starting with the skirt front so that I could create the inverted pleat, which
was easily done with parallel line tool, to determine the depth of the pleat,
in this case I used 50mm, so the finished pleat would be 100mm wide) and then
in transformations menu I used click line
as mirror line with +copy selected, then it’s just a matter of tidying up
overlapping lines with separate and delete tools.
 |
| Mirror transformation making the inverted pleat on center front |
I finished the pattern with seam allowances
using parallel, corners and text, notches and grain lines.
 |
| Skirt with yoke and inverted pleat |


