Part organisation in Grafis and the
exercises that follow in this chapter from the download educational manual (here)
really is a consolidation of all that has been learnt in the previous chapters.
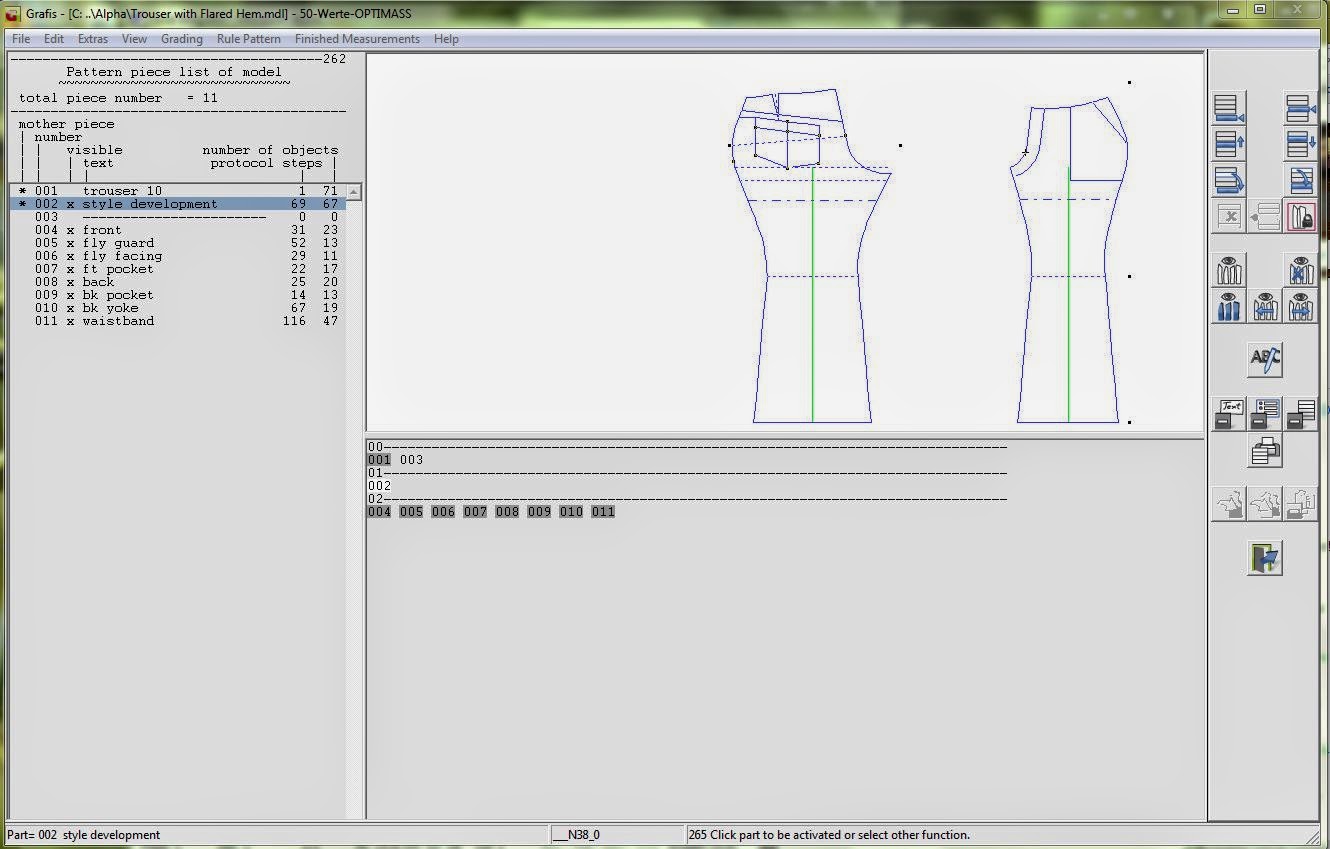
Part Organisation is the method Grafis uses
to logically arrange the pattern pieces that are developed from basic blocks to style development which generates the pattern pieces for production, Grafis
calls this “Hereditary automatic”. It is a genius way of viewing pattern pieces
and insuring that the traced pattern piece (successors) using the ‘insert’
function in the basic menu all follow the mother part (ancestors). Insert without transformation is the
most common method for passing hereditary information from one part onto
another part. Therefore, alterations to the basic block are automatically
transferred to the others pattern piece, there are however rules to follow; but
Grafis warns you along the way… so read the pop-up boxes carefully before you
proceed to make changes.
One very important rule to keep in mind is;
“Hereditary information can only be passed on to parts with a higher part
number”. Therefore as you make more pattern pieces the number of the part will
be greater than the basic block which is called into the first part, which is
typically 001, all other parts will have a higher number i.e. 008 waistband,
016 fly facing etc. In the educational version of Grafis (download here) you
can only have up to 20 parts, which is more than enough to learn how it all
works! In the licensed version the number of parts is limited to 500! (That's alot of pattern pieces)
 |
| Trousers with flared hem |
In part organise you can also duplicate a
part, this is simply a copy of the part in the same generation, it allows for the
new development variations without the dependency of daughter parts, and can be
used for comparison as changes are clearly visible when the pieces are layered,
the duplicate can also be easily deleted or reset by clicking back. A simple
example of this was to duplicate the waistband in a trouser exercise and change
the x value that determines the waistband width. The x and z values are also
duplicated to the copied part.
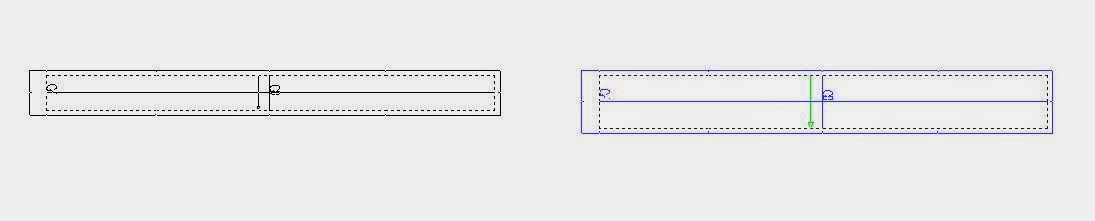 |
| Duplicated waistband - one is wider! |
Trouser with flared hem
In the exercise “Trouser with a flared hem”
I learnt something new, and that is to use break sizes to adjust the
values for example knee widths and hem
widths in the finished measurement drag area. This is done on the basic block,
by activating the basic block, right click to select finished measurements and on the main
menu bar click the ‘set break sizes’ button (which is highlighted in yellow) and input the values directly into the window.
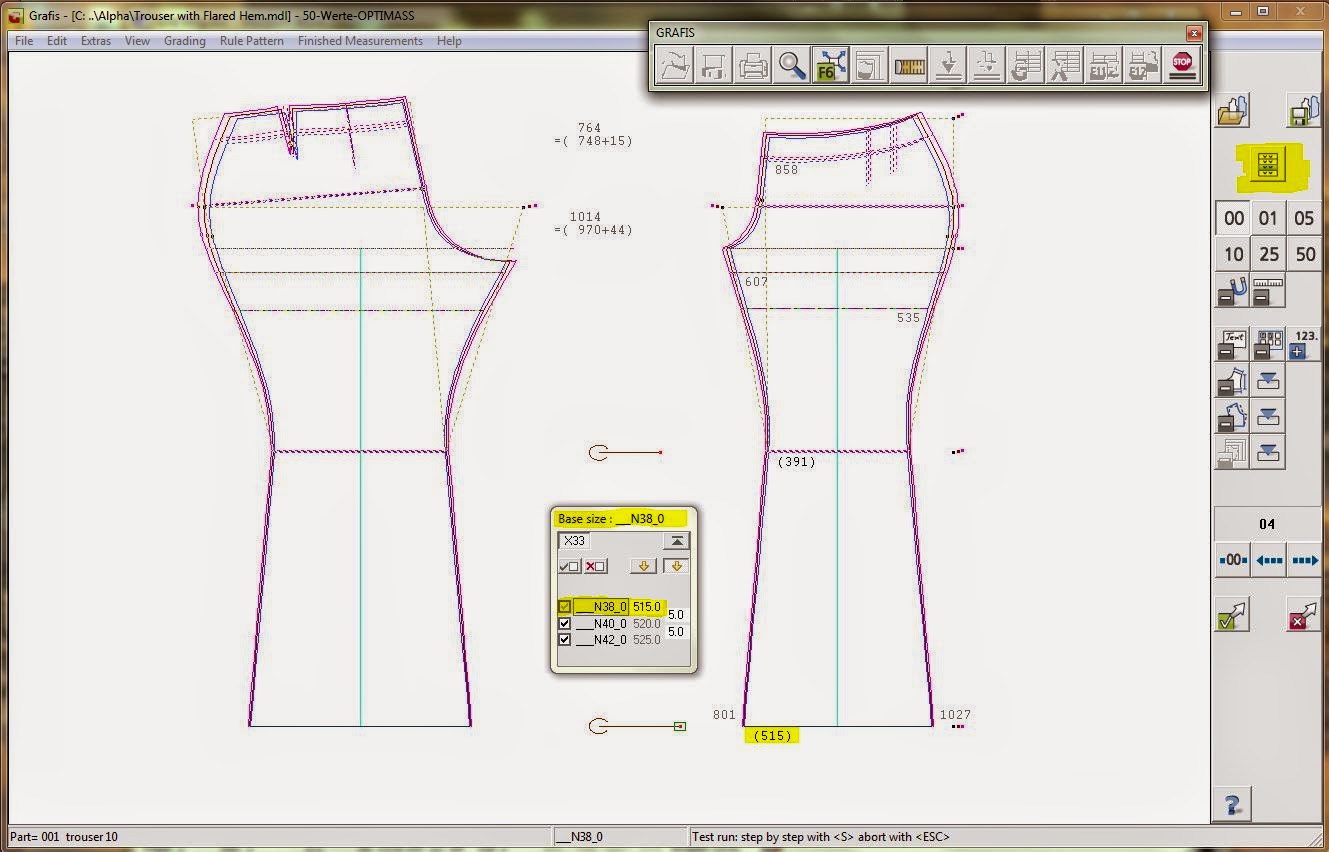 |
| Set break sizes in finished measurement |
I really enjoyed these exercises because I
was able to put all my learnt tools into action and I was guided through
setting up the part organisation with correct labeling and inputting global
x-values, step by step. These exercises maximize the satisfaction of learning
to make a pattern in Grafis without the stress of having to figure it all out
for yourself.
Check out the trouser back curved yoke,
developed from the trouser with flared hem above.
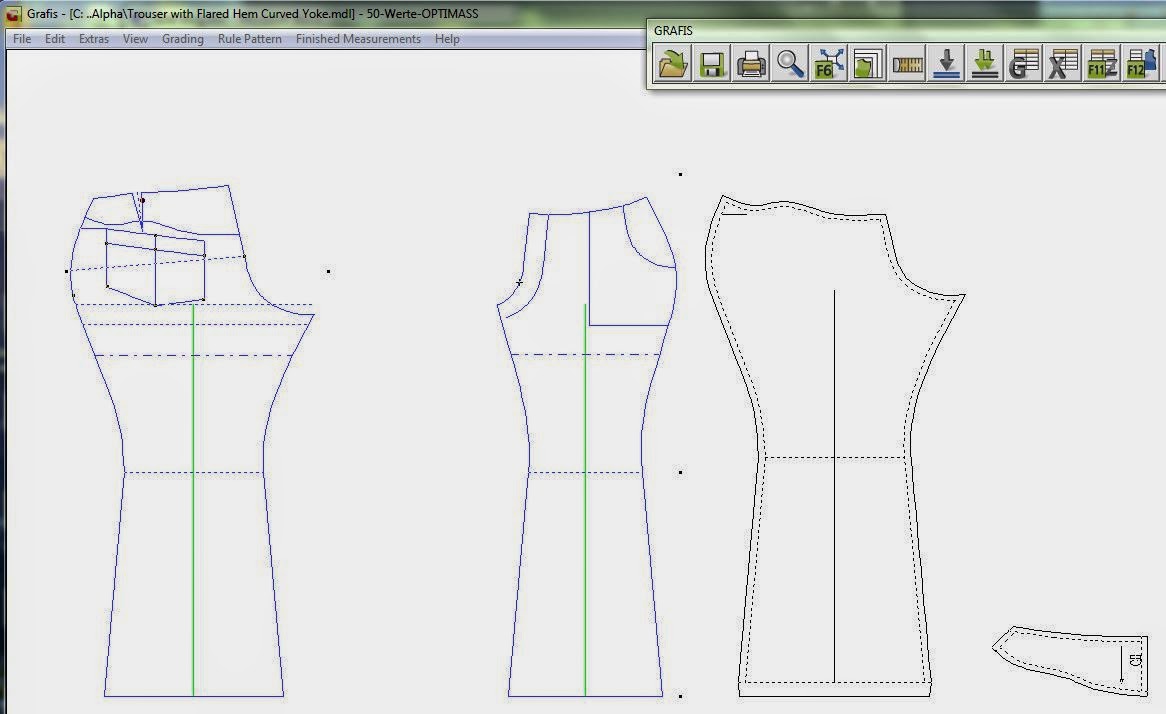 |
| Curvy back yoke on flared trouser |
Straight skirt with yoke
The straight skirt with yoke was a chance
to practice the interactive Corner 30
(vent corner) tool. As you can see below I had to go over the basic’s again to
get it right.
 |
| Skirt with simple curve yoke |
 |
| Vent tool practice, again and again! |
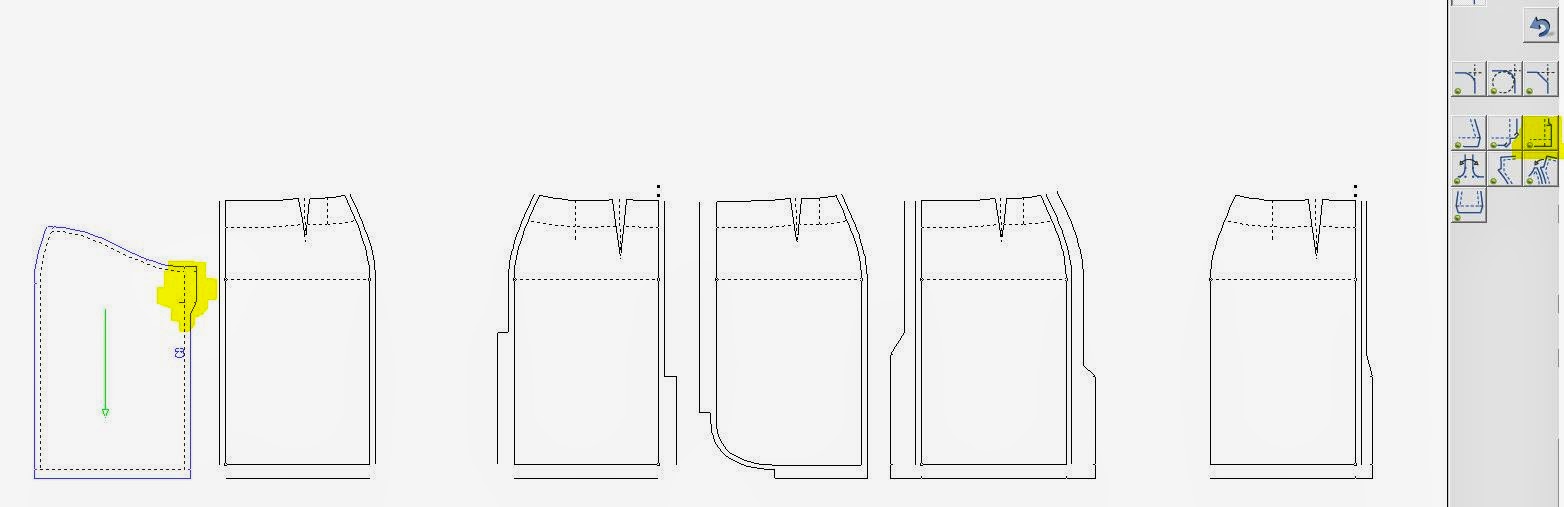
Skirt with box pleat
The skirt with a box pleat is something I
have made many times, I drafted it as an exercise in flat pattern making and so
I felt very comfortable to recreate it using Grafis. The area that I found
tricky was I wanted to use the interactive Corner 30 vent tool for my back
vent at the hem and for the back zip
seam width and length, but the interactive corner tool does not allow for x
values to be used, so I had to just enter the values as is. I found this
frustrating and need to find out why it did this… I must ask a Grafis expert!
Perhaps it is just so and I should just use a line and curve tool to draw the
vent shapes in.
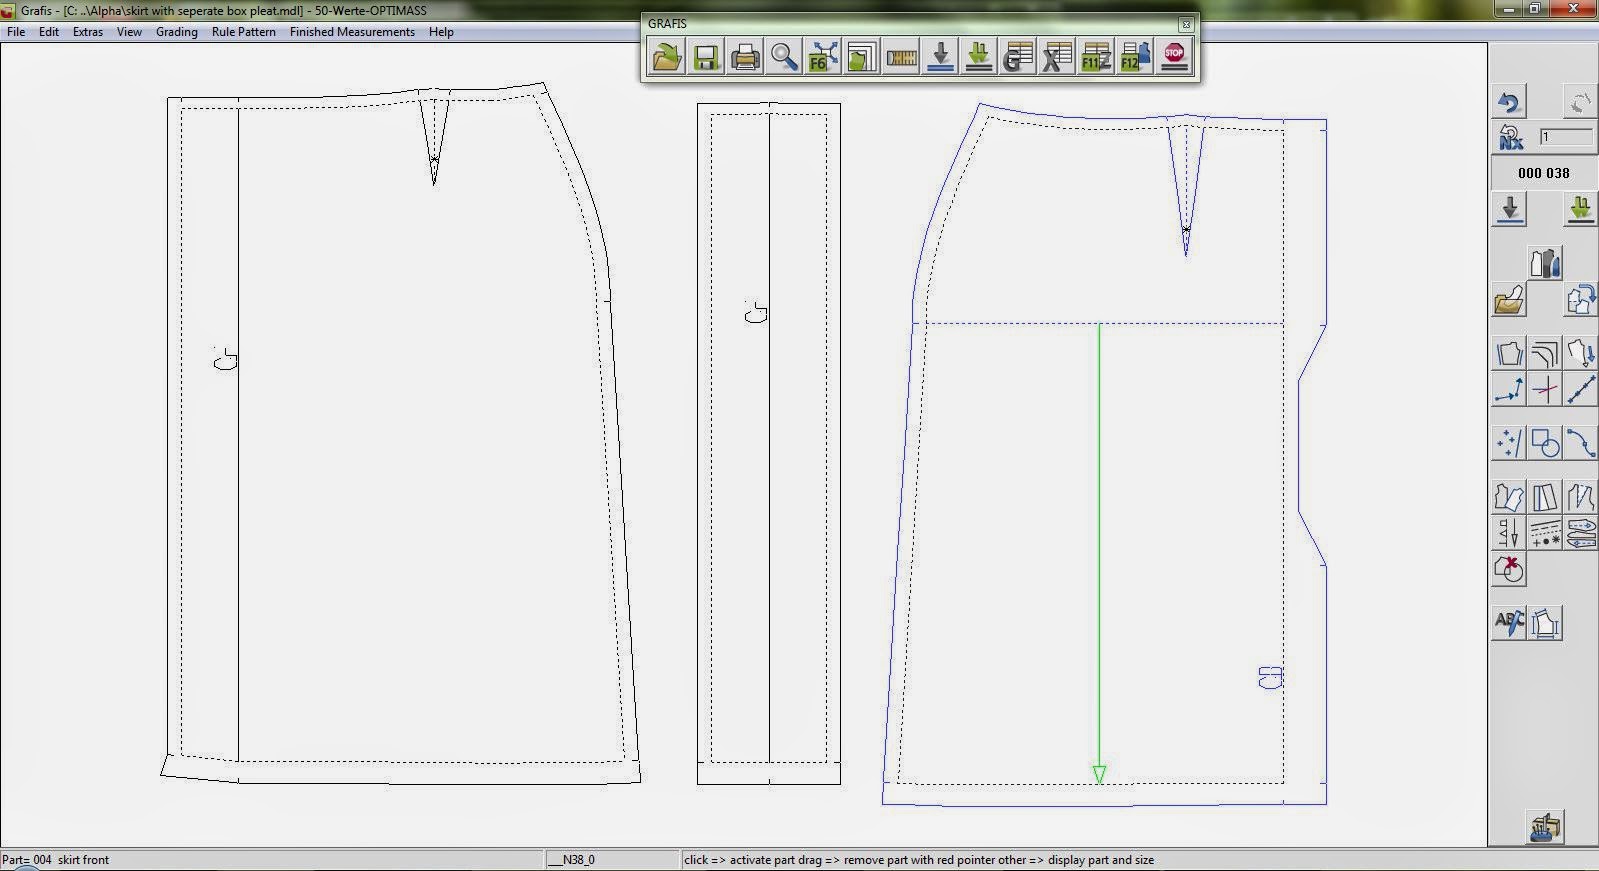 |
| Skirt with separate box pleat on Cf, with zip & vent on CB |
Shirt blouse with pin tucks in the front and various back variations.
The shirt blouse is developed from one used
earlier in the lessons, page 68 in the manual gives you the steps to create the
basic shape you need from bodice 10. I timed myself to see how quickly I could
do this and it took 2 hours from start to finished pattern, seam allowances and
all! Which I think is a great success as to do this manually would have taken
double that time!
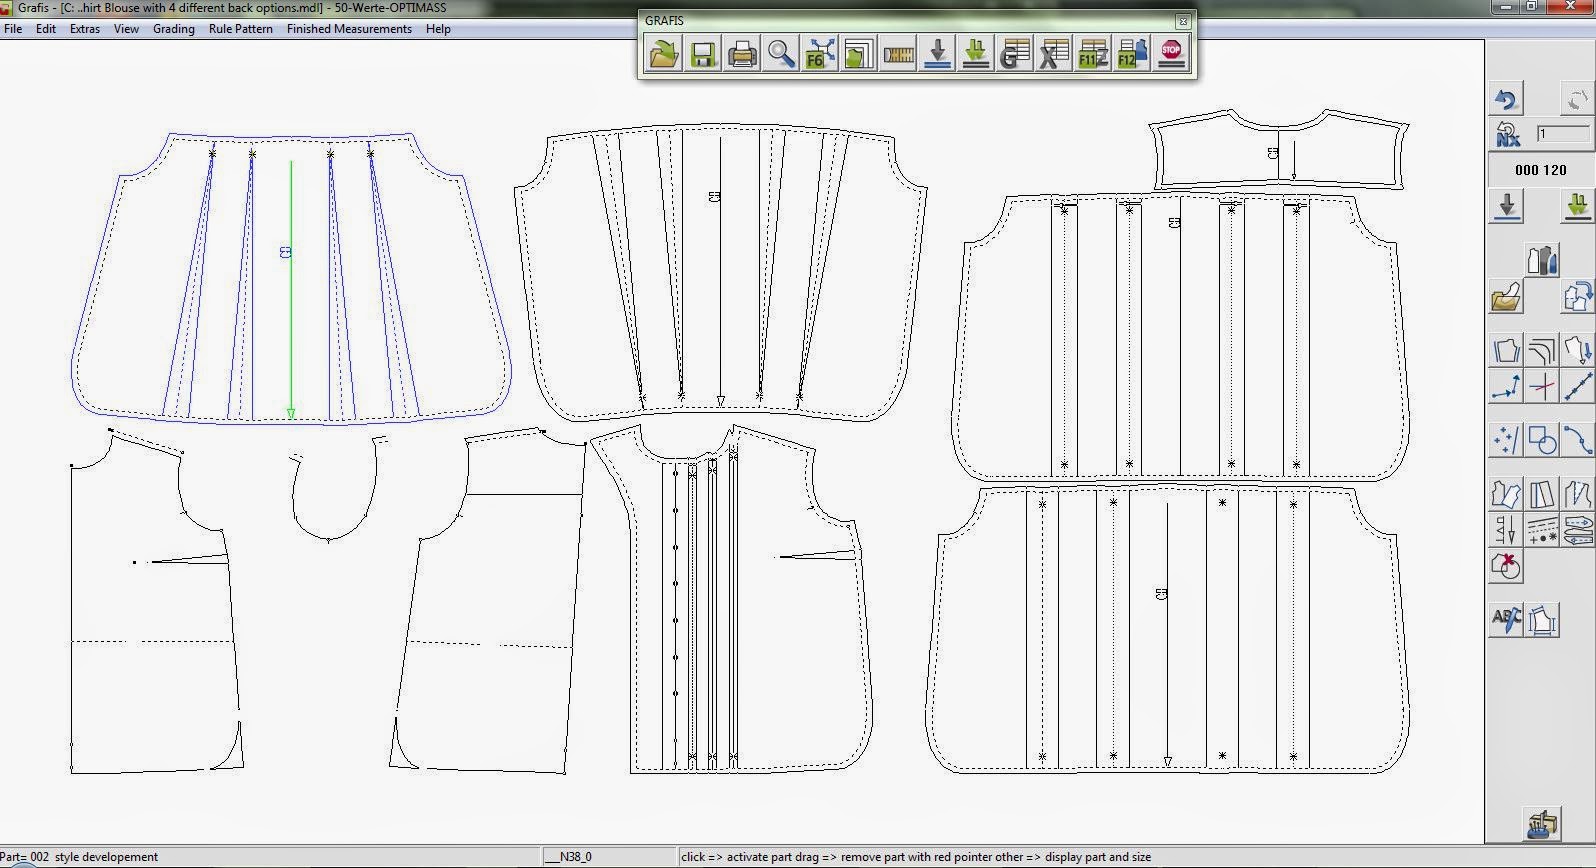 |
| Shirt blouse with four different backs options |
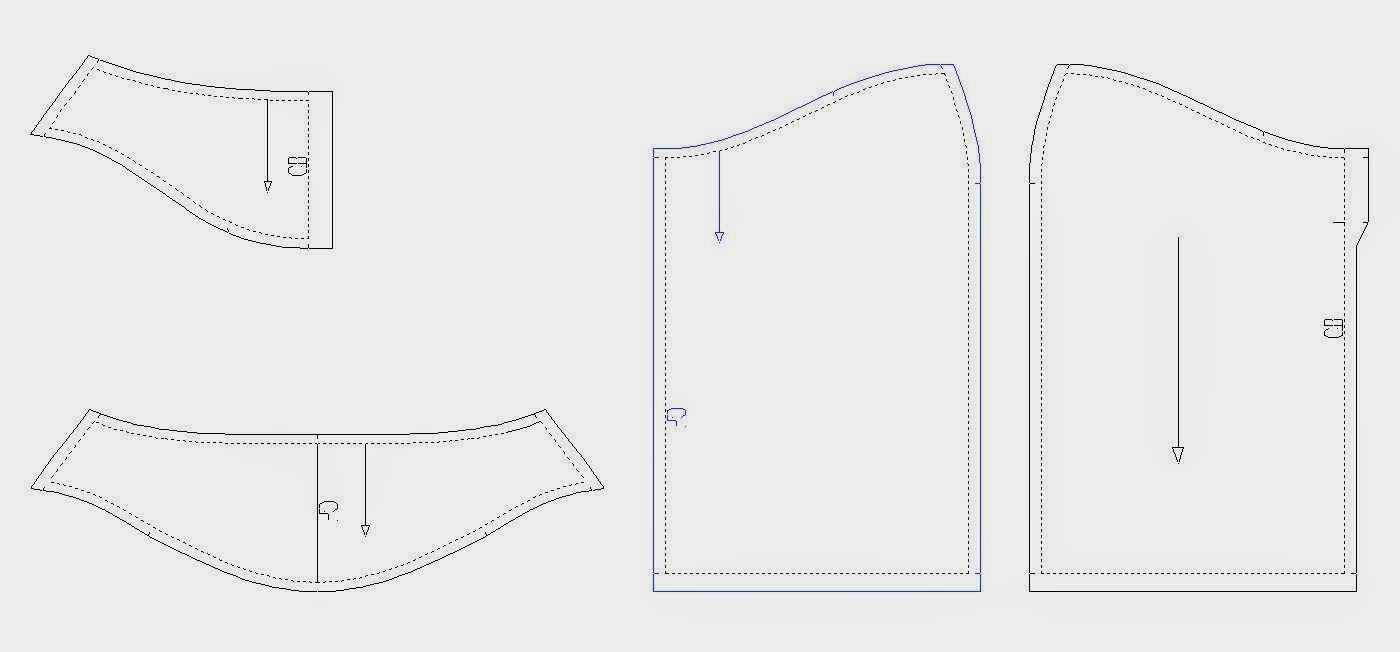
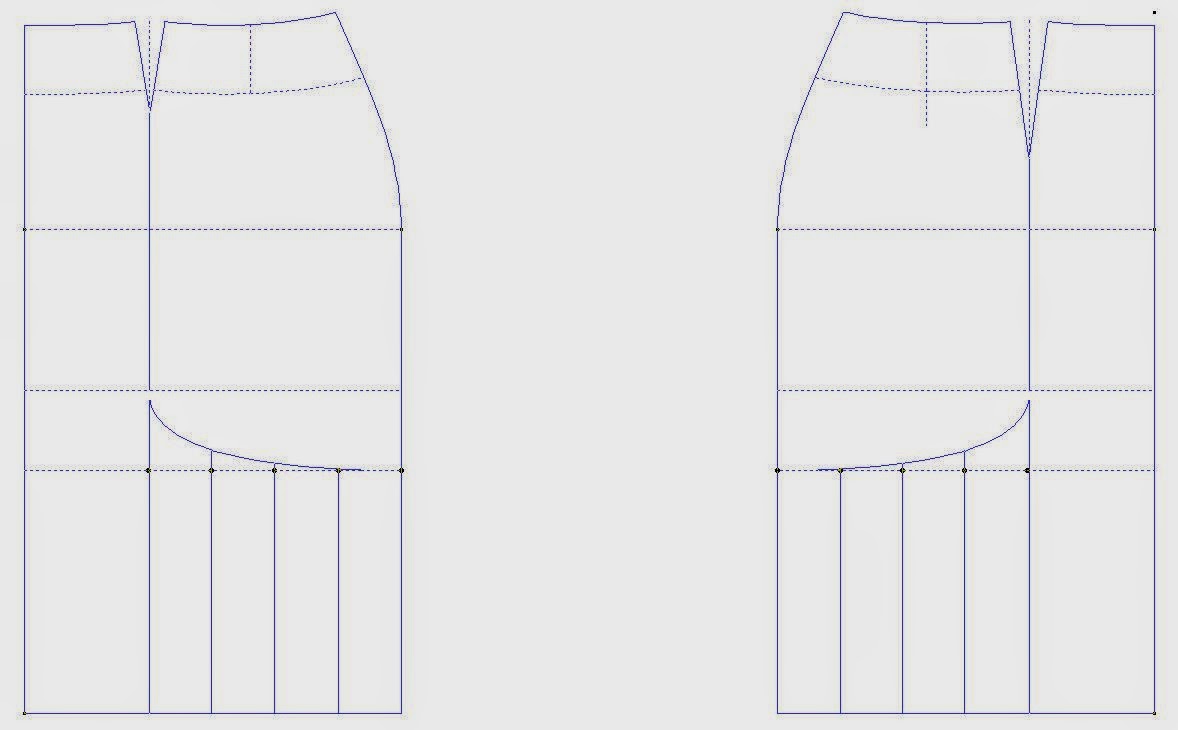
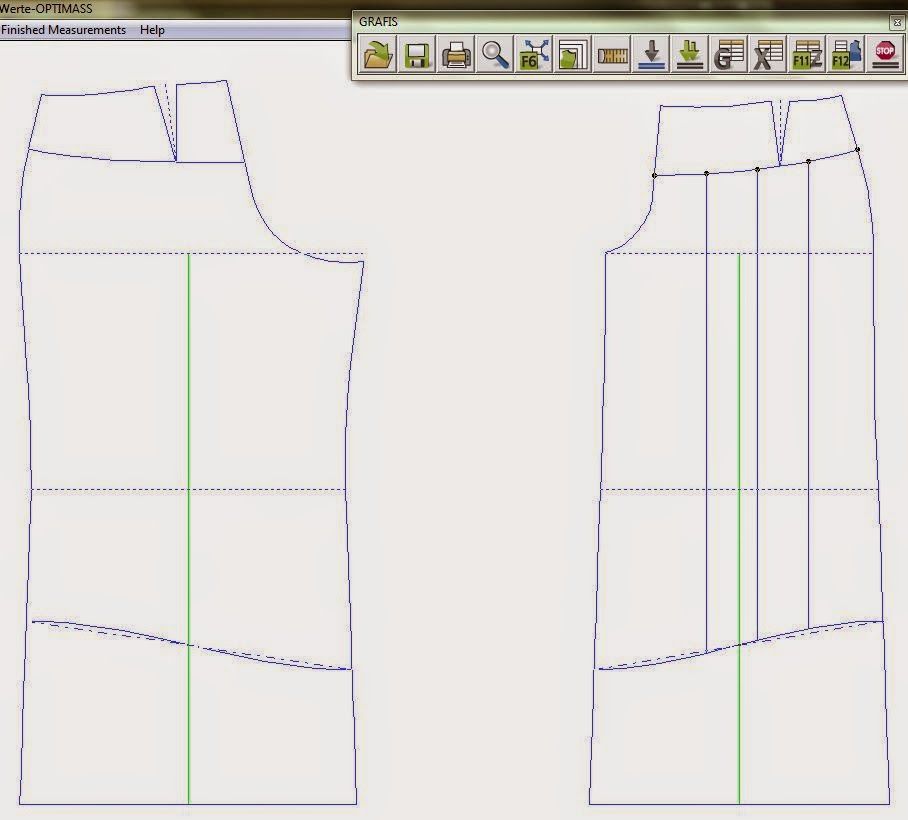
Flared skirt
The trick with the flared skirt was not to
go ahead and use a perpendicular line but use the Line 10 parallel tool instead
in case the hem is modified interactively later. X values are also part of the
style development, determining the curve depth and the distance that the curve
begin from the hip line.
 |
| Flared skirt development |
 |
| Flared skirt pattern |
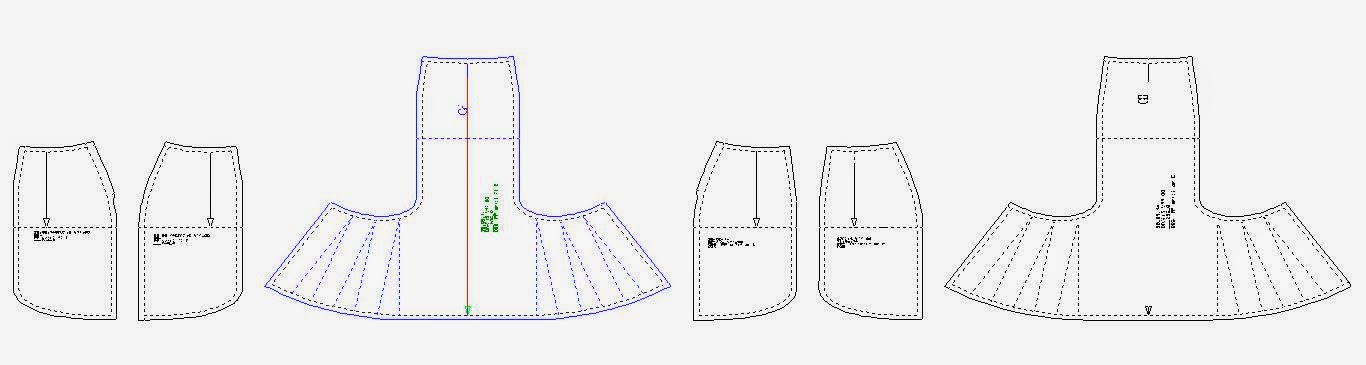
Culottes
The interesting feature with the Culottes
in the next exercise is that the fullness is not into the front hem but into
the front yoke line. So don’t make the mistake I did when I first saw the
raster in the front yoke line and spread the fullness into the hem of the trouser/culotte
I had to quickly rewind my steps.
 |
| Culottes style developement |
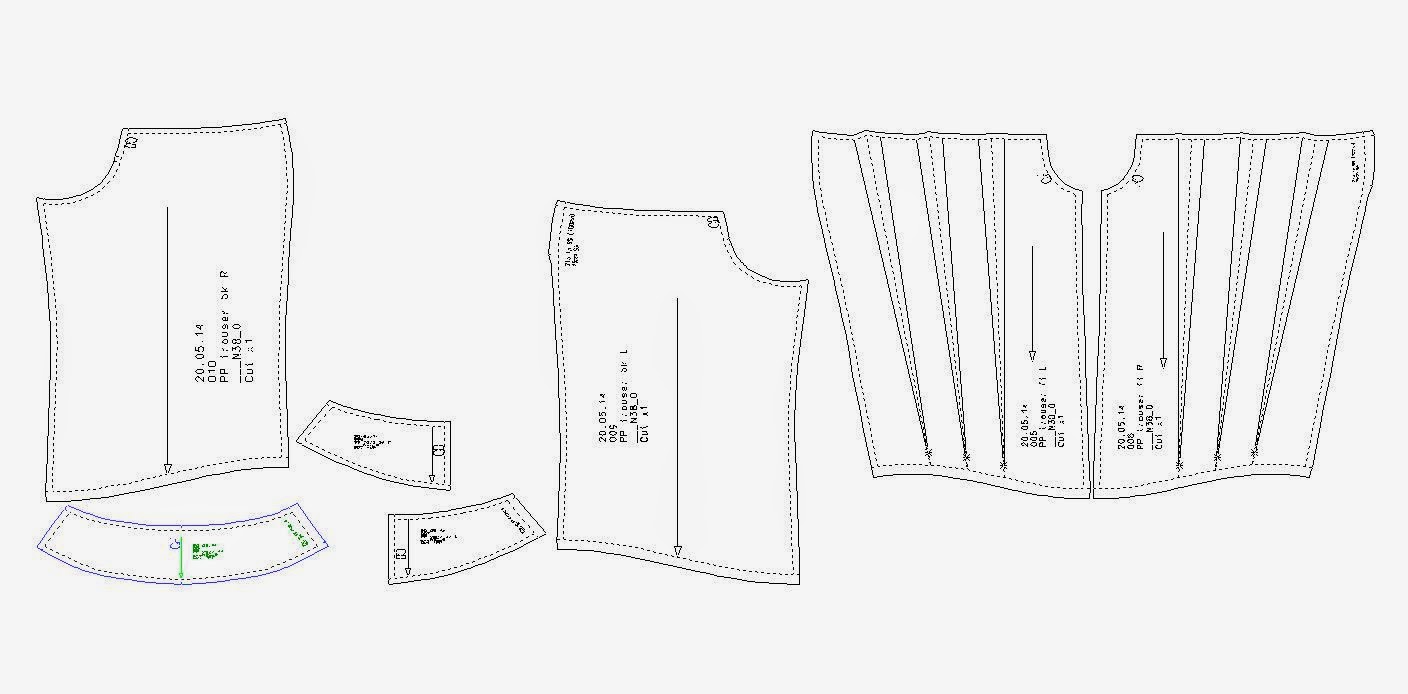 |
| Culottes pattern |
Dress with princesses panels
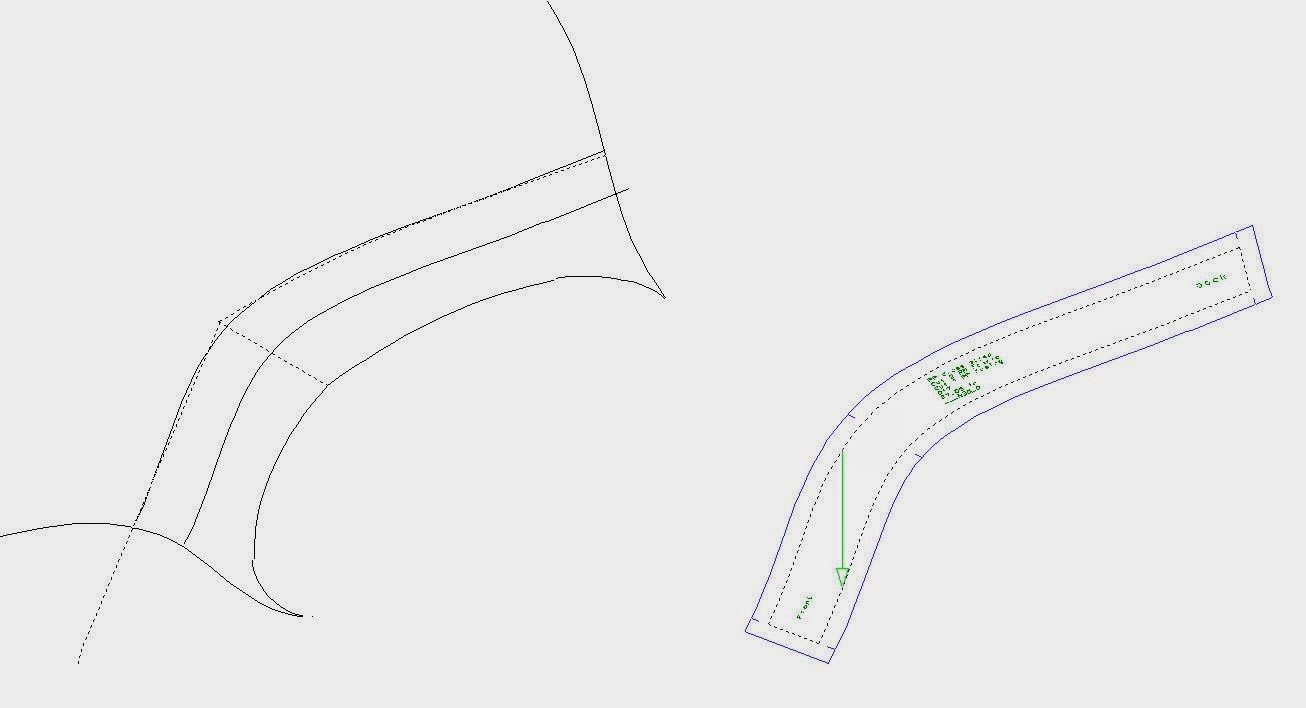
Dress with panel seams, looks pretty
straight forward and then you have to make the facing. This involves becoming
very comfortable with the Transformations menu ‘turn and move’ tool. (If you
can’t remember have a look back in the manual to page 138) Try to remember it
this way; 1 click what you want to move, 2 click rotation angle, 3 click final
resting place of point 1, 4 click final point of rotation point 2. /or just look
at pg 138J Odds and odds, evens and evens! As an added bonus you also get to
use the Front part 20 tool and Back part 20 tool, which you will find in your
pin cushion/sewing box icon on your main menu.
 |
| Dress with panels style developement |
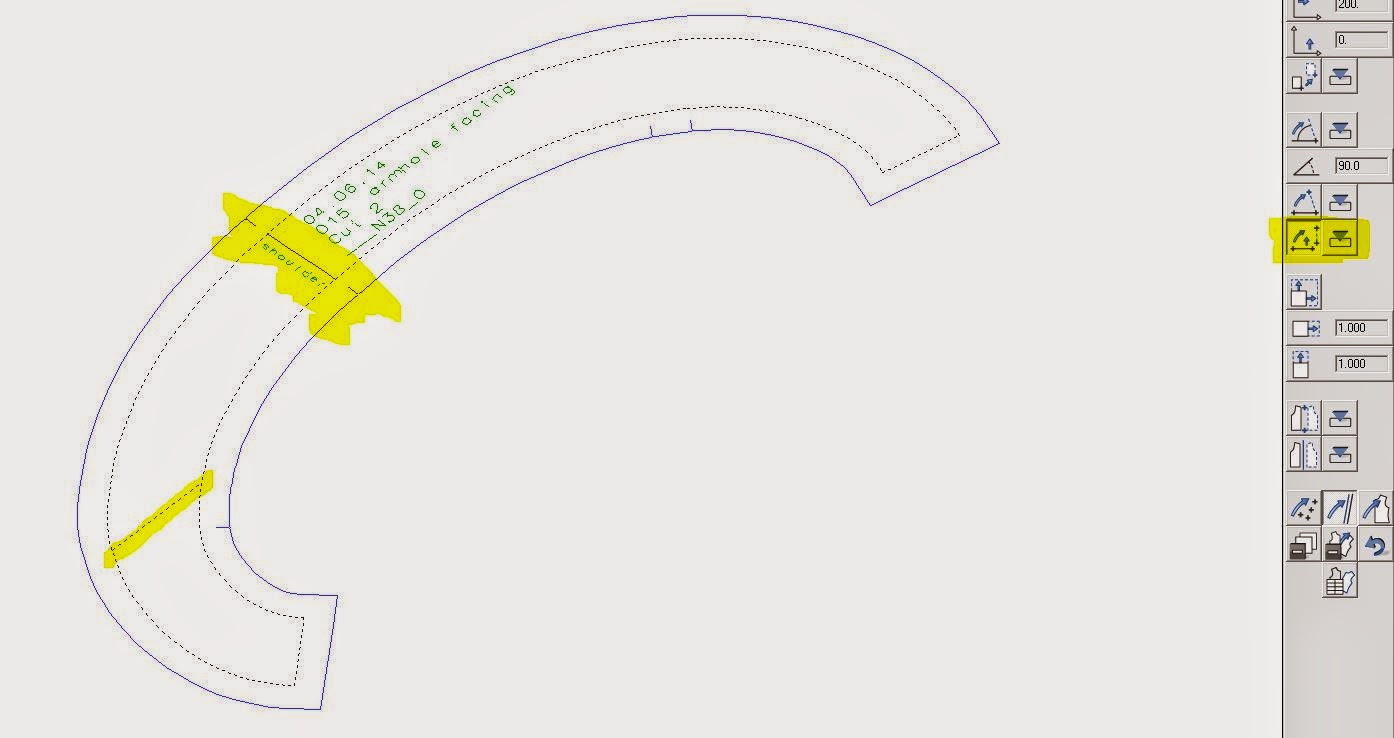 |
| Dress with panel - Armhole facing |
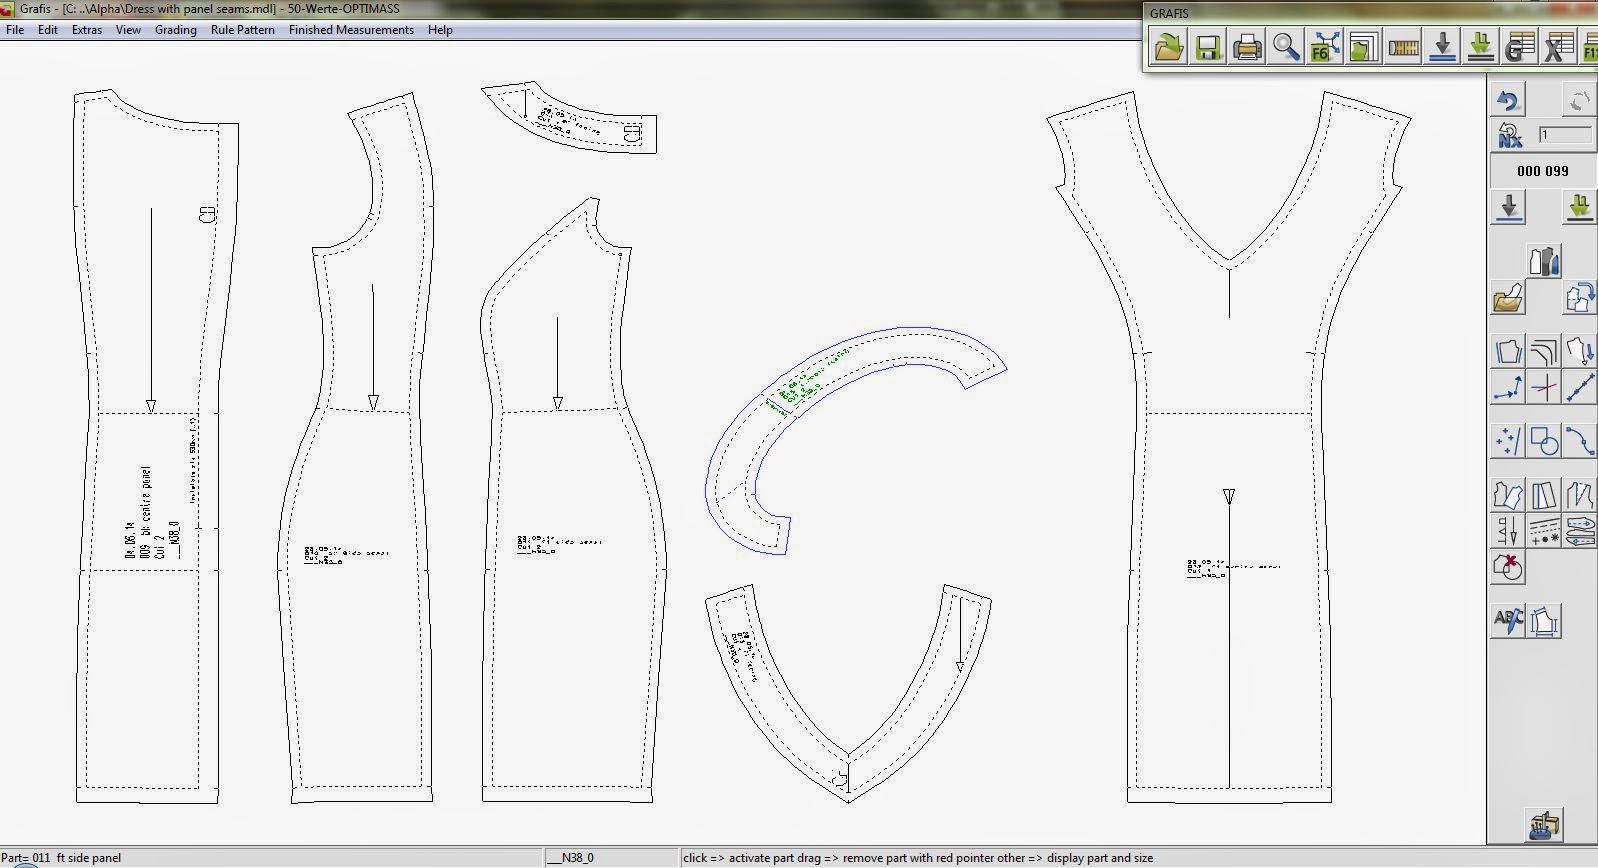 |
| Dress with panels pattern |
Long dress with sweetheart bust line and godets
Long Dress with godets. The godets are
constructed using the transformation turn turn pt+angle and an x value to
position length of the godet from the hem. This exercise also asks that you
make a fitted shaped strap for the dress using the bust dart line, shoulder
line, armhole and back, front dress design line.
 |
| Strap developement |
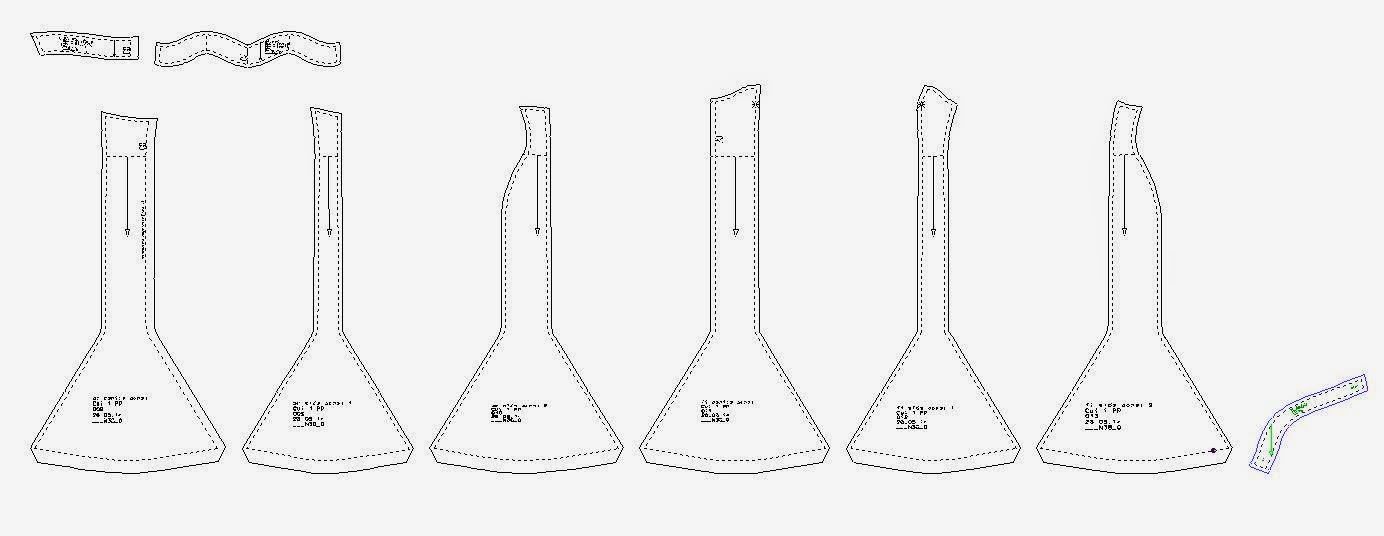 |
| Dress with godets pattern |
Cargo pants
And lastly the casual trousers with two zip
pockets in the legs and patch pockets. I really enjoyed making this pattern, I
like puzzles with many pieces! It is also a very popular style, cargo pants and
hiking gear, I’m always fascinated by these trousers! It makes me think of
adventure and rough mountain trails in exotic locations, where you might need a
torch and a knife… lol enough day dreaming!
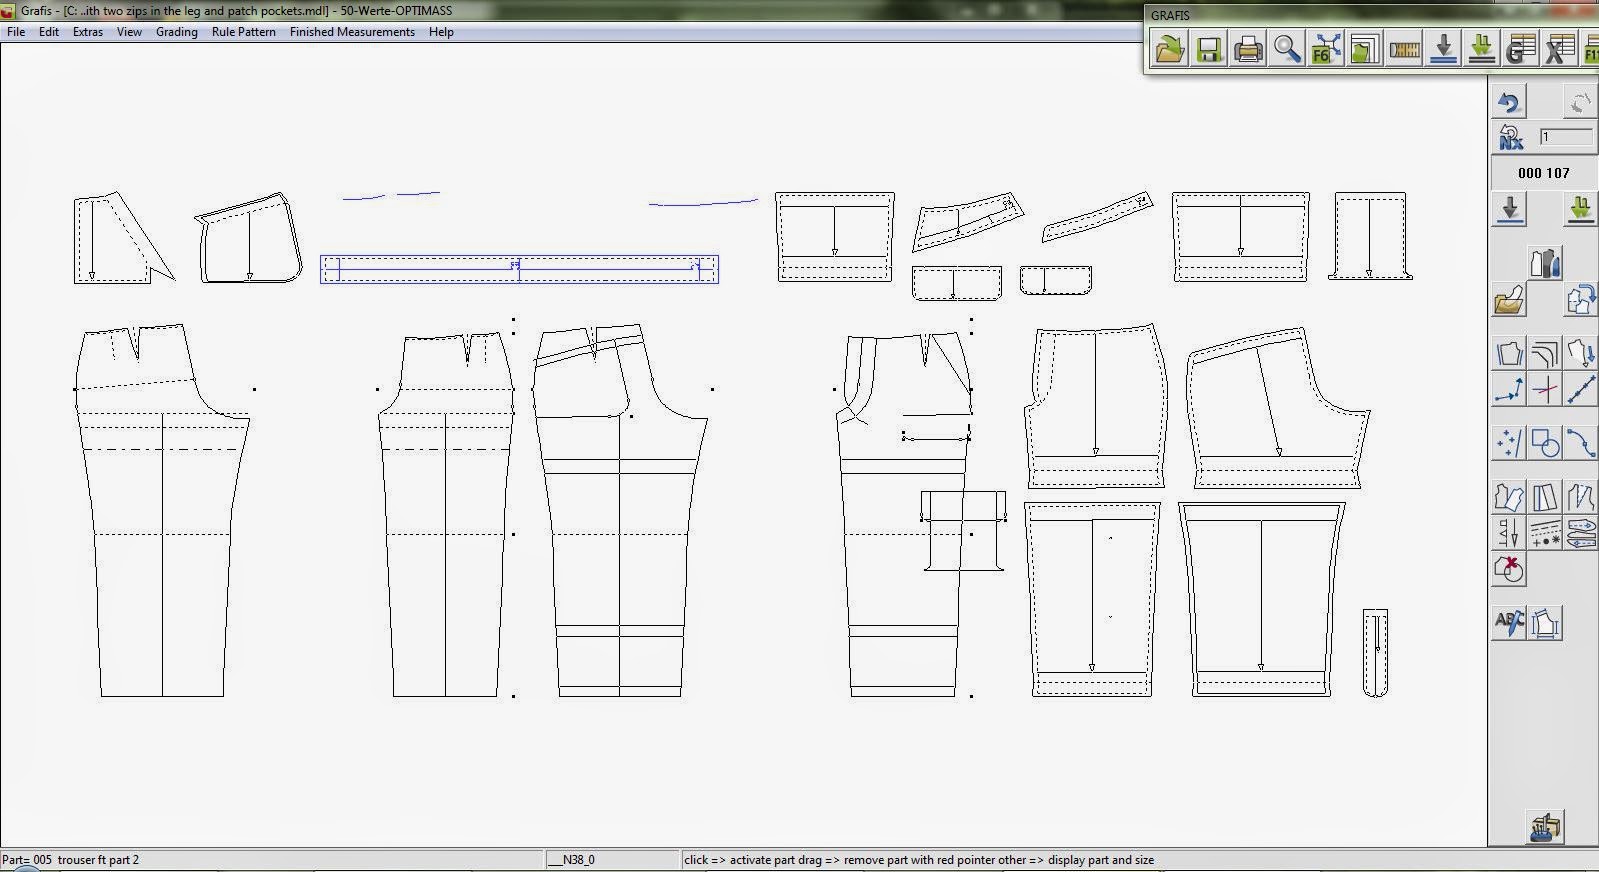 |
| Cargo pants pattern |
As I have written before these exercises
are from Grafis as part of the educational material they offer on the website. I really enjoy this CAD programme and hope to know it inside and out!
Everyday I find something new and exciting about what it can do for patternmaking
and getting a great near perfect fit! As a bye, I’m currently reading Meg
Lukens Noonan’s The Coat Route – which is a story of a $50 000 coat. I’m
relishing every word! Next time I hope to show you something from my sewing
table x
No comments:
Post a Comment